This guide walks through Auto Refresh Master with screenshots. Open the extension by clicking its icon in the browser toolbar. The small i next to each option explains it when you point at it.
- First use: accept the terms
- Start refreshing a page
- Choose how often
- Options and stop conditions
- While it is refreshing
- The timer on the page
- Monitor a page and get alerts
- Auto-click, cookies and macros
- Settings and shortcuts
1. First use: accept the terms
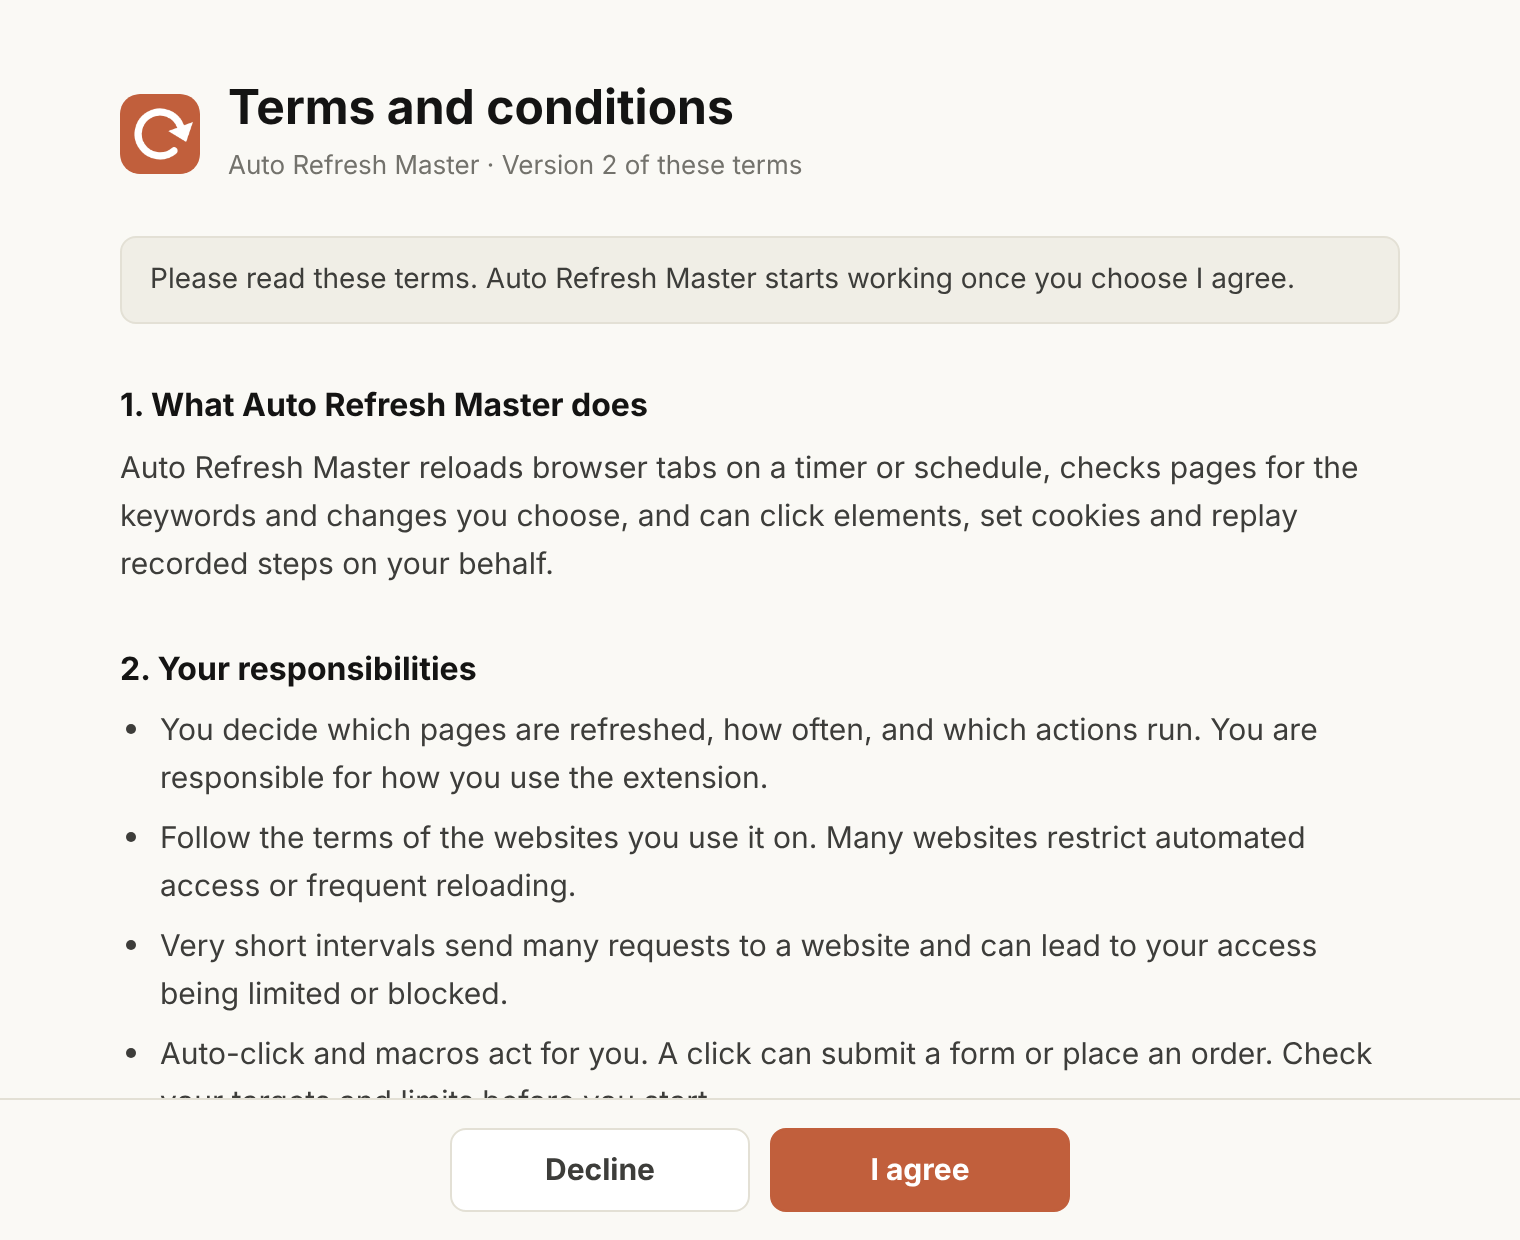
When the extension is installed, the terms and conditions open in a new tab. The extension stays switched off until you choose I agree. If you choose Decline, nothing is refreshed and you can come back and agree later.
2. Start refreshing a page
- Open the page you want to refresh.
- Click the Auto Refresh Master icon in the toolbar.
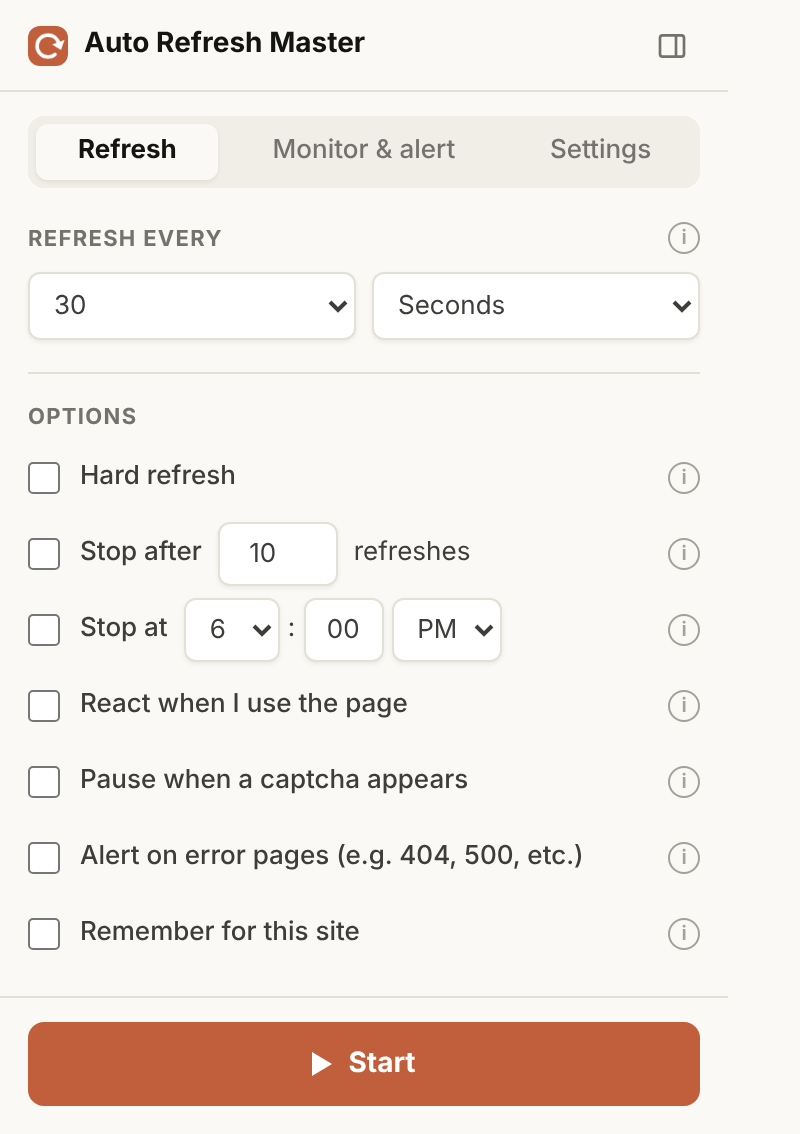
- On the Refresh tab, enter a number under Refresh every and choose the unit next to it.
- Click Start.
The first time you start on a website, the browser may ask you to allow access to that site. This is needed for the timer on the page, monitoring and clicking. You can decline; the refresh timer still runs.
3. Choose how often
The dropdown next to the number sets the kind of interval:
- Seconds, Minutes, Hours: a fixed interval. The number box offers common values, and you can type your own.
- Hours, minutes, seconds: a precise interval such as 1 hour 30 minutes.
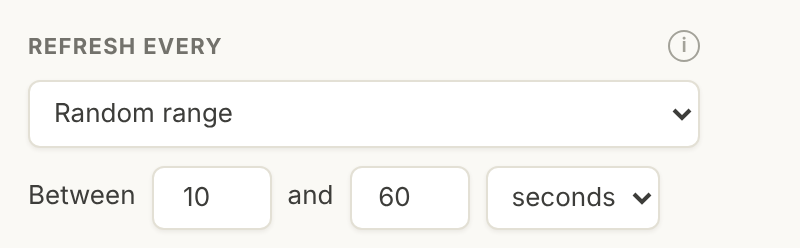
- Random range: a random time between two values, different on every refresh.
- Custom time: every day at the time you set.
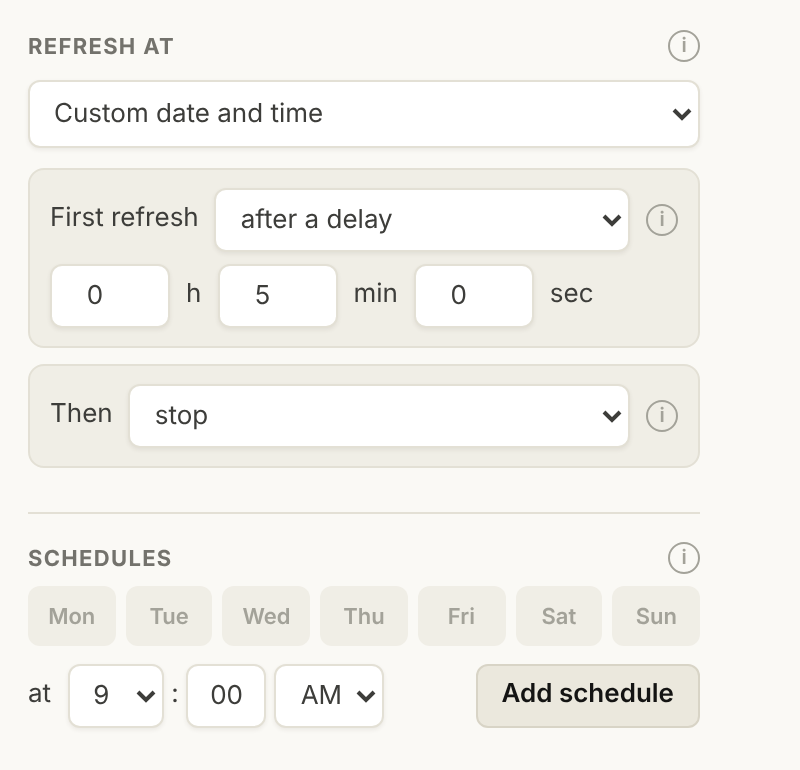
- Custom date and time: the first refresh happens after a delay or at an exact date and time, and you choose what happens next.
Custom date and time, and schedules
With Custom date and time you set the First refresh (after a delay, or at a date and time) and what happens Then (stop, or repeat at an interval). Under Schedules, pick the days and a time and click Add schedule to refresh this page automatically on those days. Saved schedules can be edited or removed.
4. Options and stop conditions
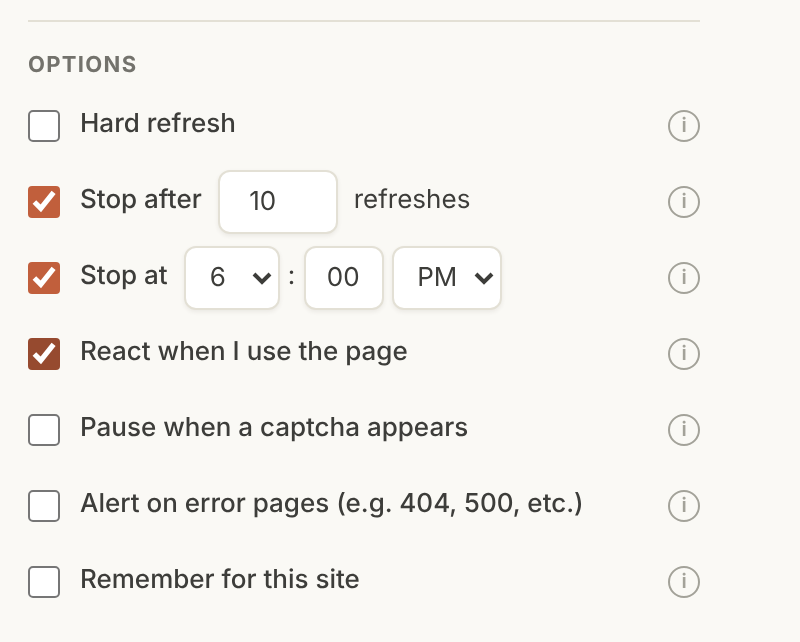
- Hard refresh: reloads without using the browser cache.
- Stop after: stops after the number of refreshes you enter.
- Stop at: stops at the time you set. If both stop options are on, the one that comes first is used and the extension asks you to confirm.
- React when I use the page: reacts when you move the mouse or type on the page. By default the refresh is held until you stop using the page; in Settings you can choose to stop refreshing or restart the countdown instead.
- Pause when a captcha appears: pauses so you can solve it.
- Alert on error pages: tells you when the page returns an error such as 404 or 500.
- Remember for this site: starts refreshing with these settings whenever you open this website.
5. While it is refreshing
The extension shows a countdown to the next refresh, how many refreshes have run, and any stop condition or alert that is set. Use Pause to hold the timer and Stop to end it. You can close the popup; refreshing continues until you stop it, a stop condition is reached or the tab is closed.
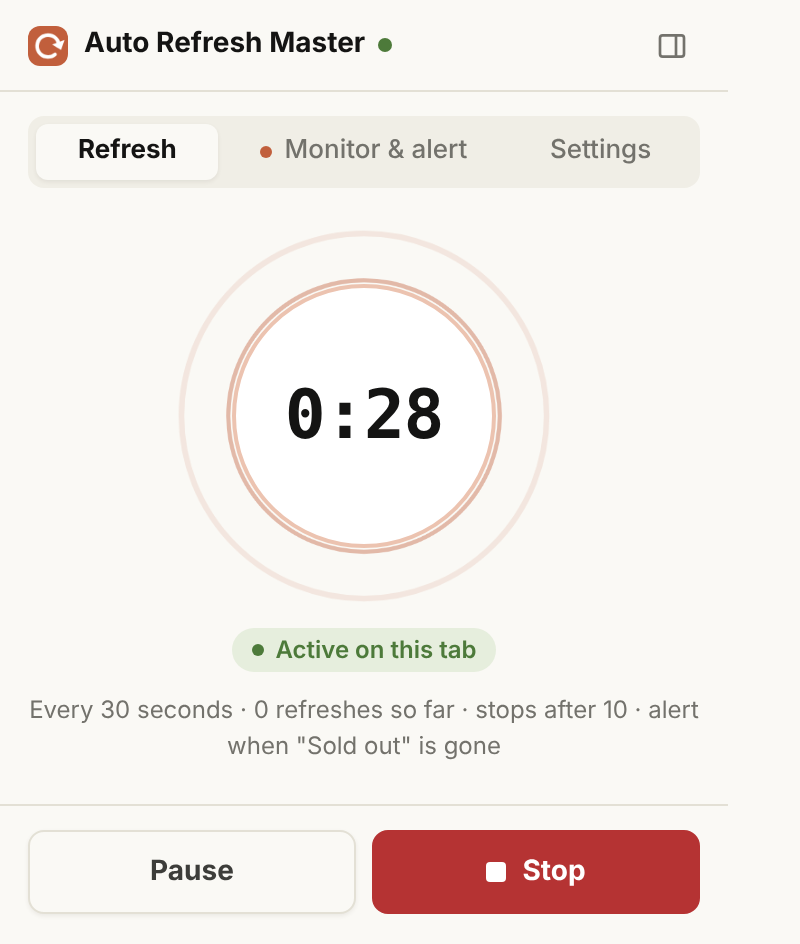
If React when I use the page is on and you are using the page, the status changes to “Waiting: you are using the page”. Click Ignore to refresh anyway on this tab.
6. The timer on the page
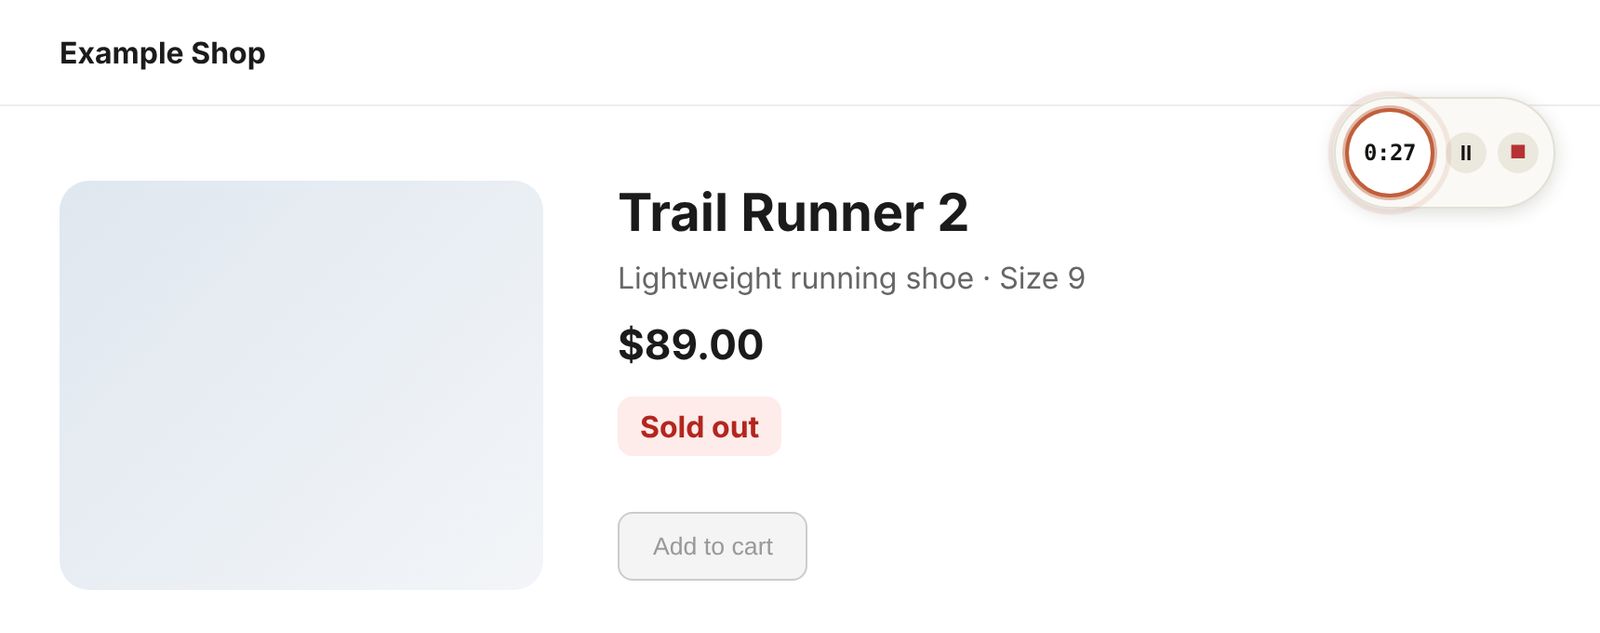
A small countdown is also shown on the page itself, with pause and stop buttons, and on the toolbar icon. You can hide it, change its style or move it to another corner in Settings.
7. Monitor a page and get alerts
Alerts need a free login. Open Settings, enter your email under Account and click Send code, then type the 6-digit code we email you. Your alert settings are saved to your account, so they are not lost and you can use them on your other devices and browsers. Refreshing works without logging in.
- Open the Monitor & alert tab and turn on Alert when.
- Choose what to watch for: a keyword is found, a keyword disappears or anything changes.
- Choose the keyword type (Text, Regex, CSS selector, XPath, HTML class or HTML id), type the keyword and click Add keyword. Or click Pick on page and click the element on the page to fill it in.
- Click Start.
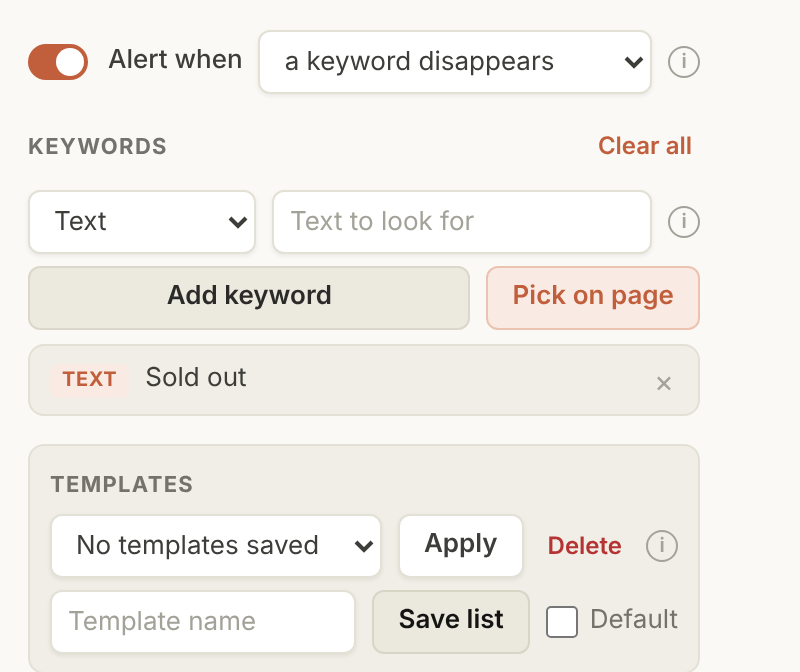
Templates save a list of keywords under a name so you can apply it again on another page. Tick Default to load a template automatically on pages that are not remembered.
Where and how to check, and what happens after an alert
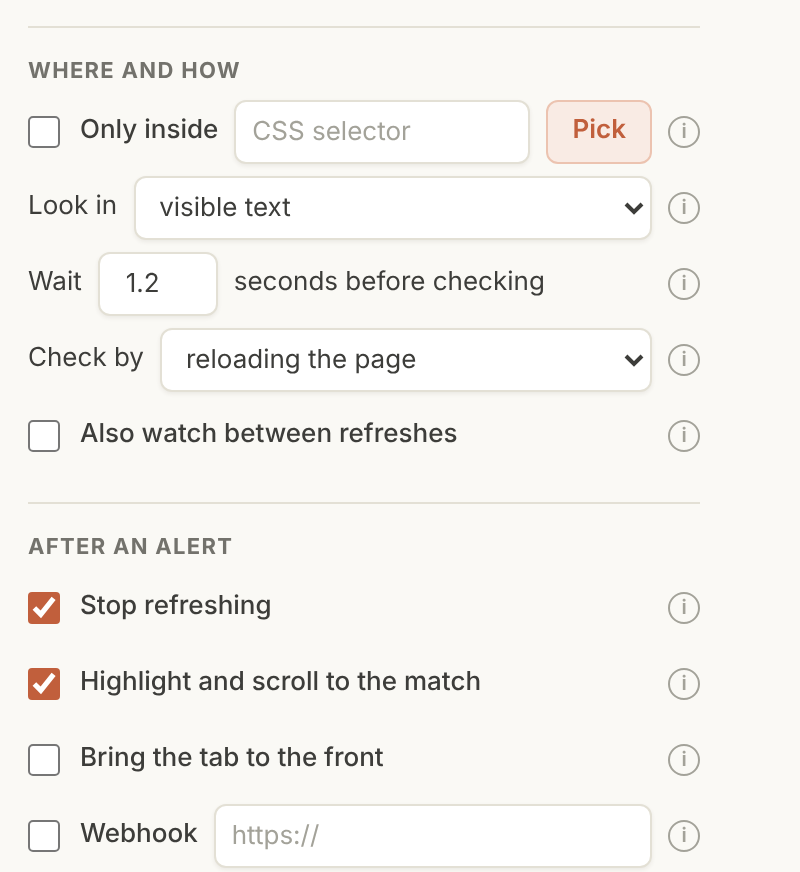
- Only inside: limits the check to one part of the page. Click Pick to select the area with your mouse.
- Look in: the visible text or the HTML source.
- Wait … seconds before checking: gives the page time to finish loading.
- Check by: reloading the page, or fetching it in the background without reloading.
- Also watch between refreshes: reacts as soon as the page changes, without waiting for the next refresh.
Under After an alert choose what happens: stop refreshing, highlight and scroll to the match, bring the tab to the front, or send the details to your own webhook address. A desktop notification is shown when an alert fires.
8. Auto-click, cookies and macros
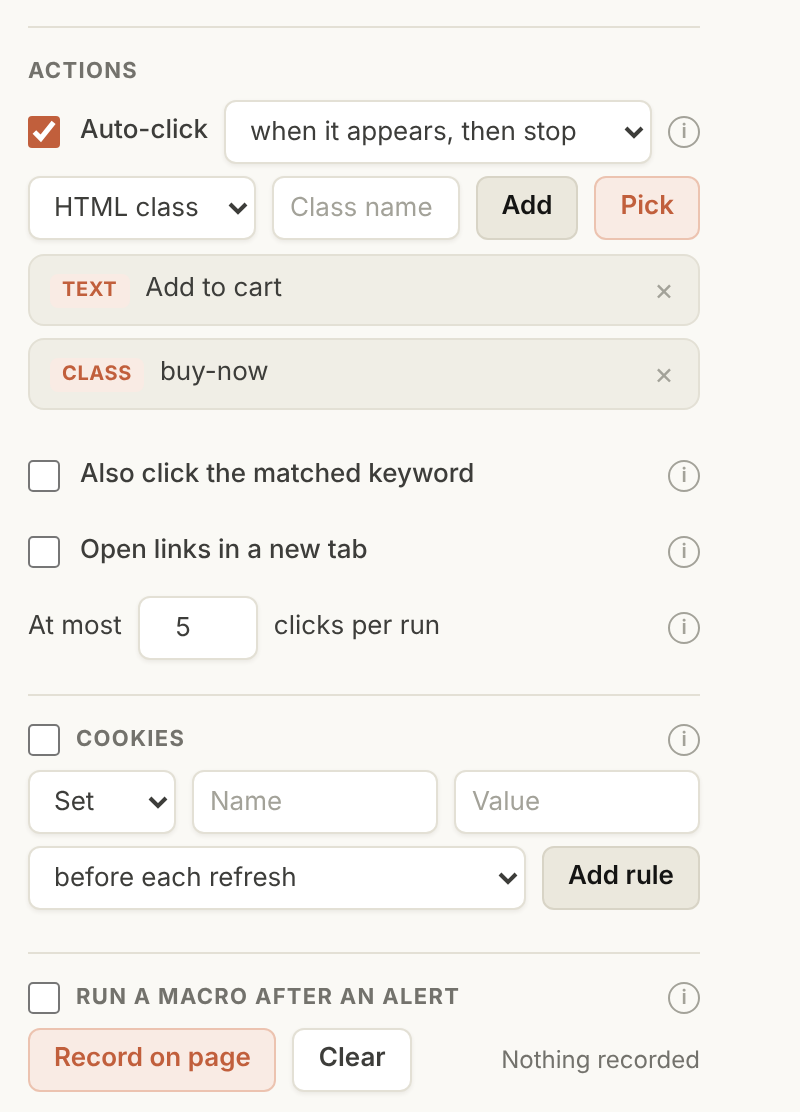
- Auto-click: clicks a button or link for you. Choose how to find it (Text, HTML class, HTML id or CSS selector), type the value and click Add, or use Pick to select the element on the page. Then choose when to click: when the monitor alerts, after each refresh, or when it appears, then stop. At most limits the number of clicks in one run.
- When it appears, then stop: the page keeps refreshing until the button is on the page and can be clicked. Buttons that are disabled are skipped. The extension then clicks it, shows a notification and stops refreshing. Example: add the text “Add to cart” so the button is clicked once the item is back in stock.
- Also click the matched keyword and Open links in a new tab control what is clicked and where it opens.
- Cookies: set or delete a cookie before or after each refresh. Enter the name and value and click Add rule.
- Run a macro after an alert: click Record on page, perform the clicks and typing on the page, and finish the recording. The steps are replayed after an alert. Password fields are never recorded.
A click can submit a form or place an order. Check your targets and limits before you start.
9. Settings and shortcuts
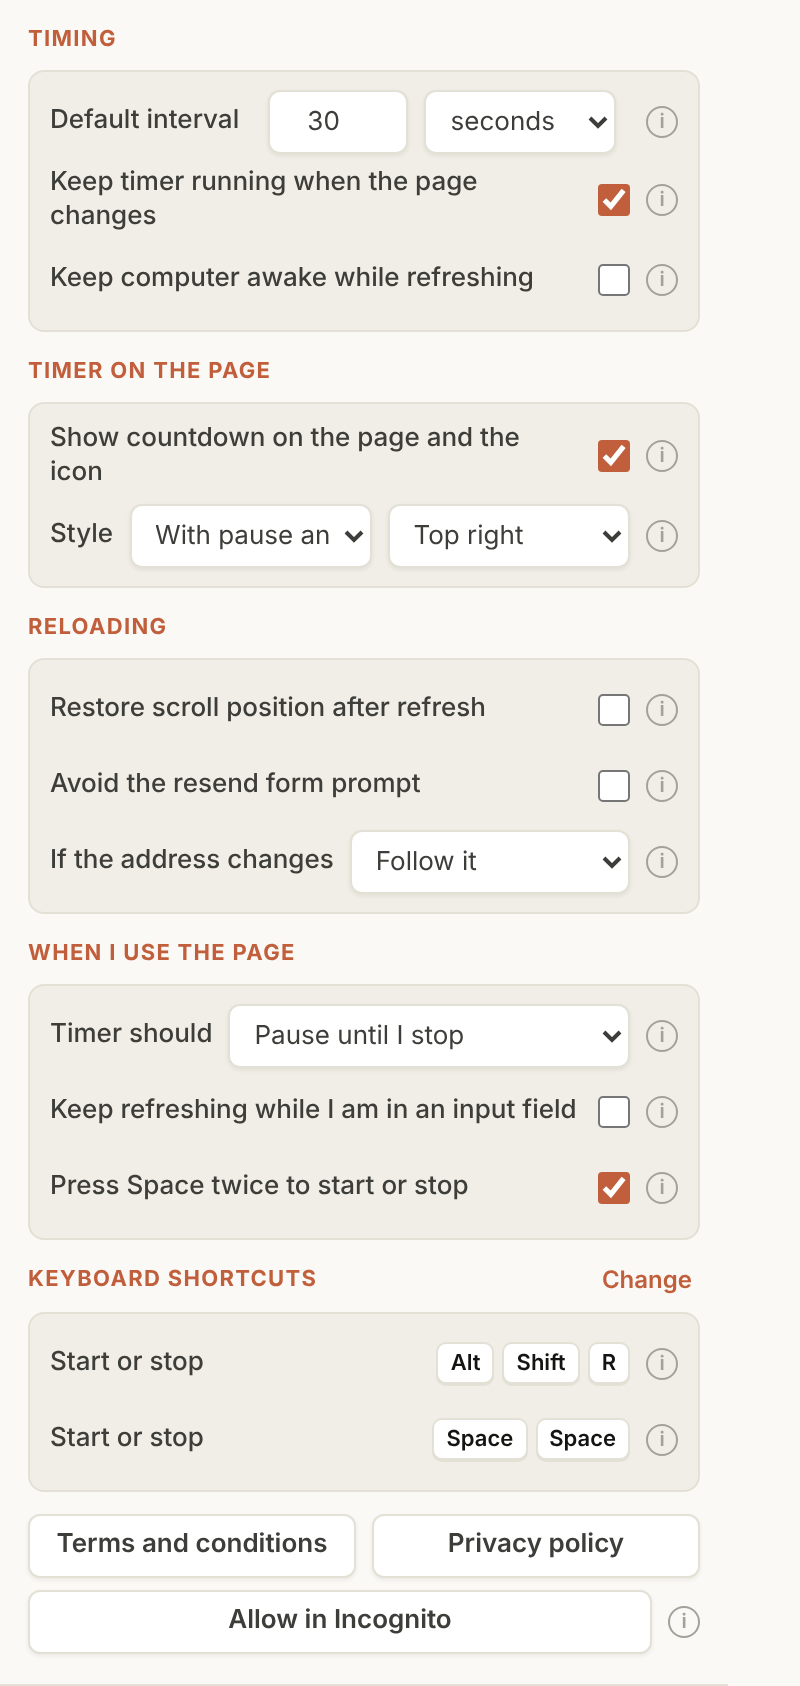
- Timing: the default interval, whether the timer keeps running when the page changes, and keeping the computer awake while refreshing.
- Timer on the page: show or hide the countdown on the page and the icon, its style and its corner.
- Reloading: restore the scroll position after a refresh, avoid the “resend form” prompt, and what to do if the page address changes.
- When I use the page: whether the timer pauses, stops or restarts when you use the page, and whether typing in a field counts.
- Keyboard shortcuts: press Alt+Shift+R to start or stop on the current tab (click Change to pick other keys). Press Space twice quickly on a page to start with the settings you last used on that site, or to stop. If the site has no earlier settings, the extension opens instead. It is ignored while you type in a field.
- Allow in Incognito: opens the browser page where you can allow the extension in Incognito windows.
The icon at the top right of the extension switches between the popup and the browser side panel.
The five stars at the top of the extension let you rate it. Click a star to send your rating; you can change it later.
Need help?
See the support page or email autorefresh.club@gmail.com.